
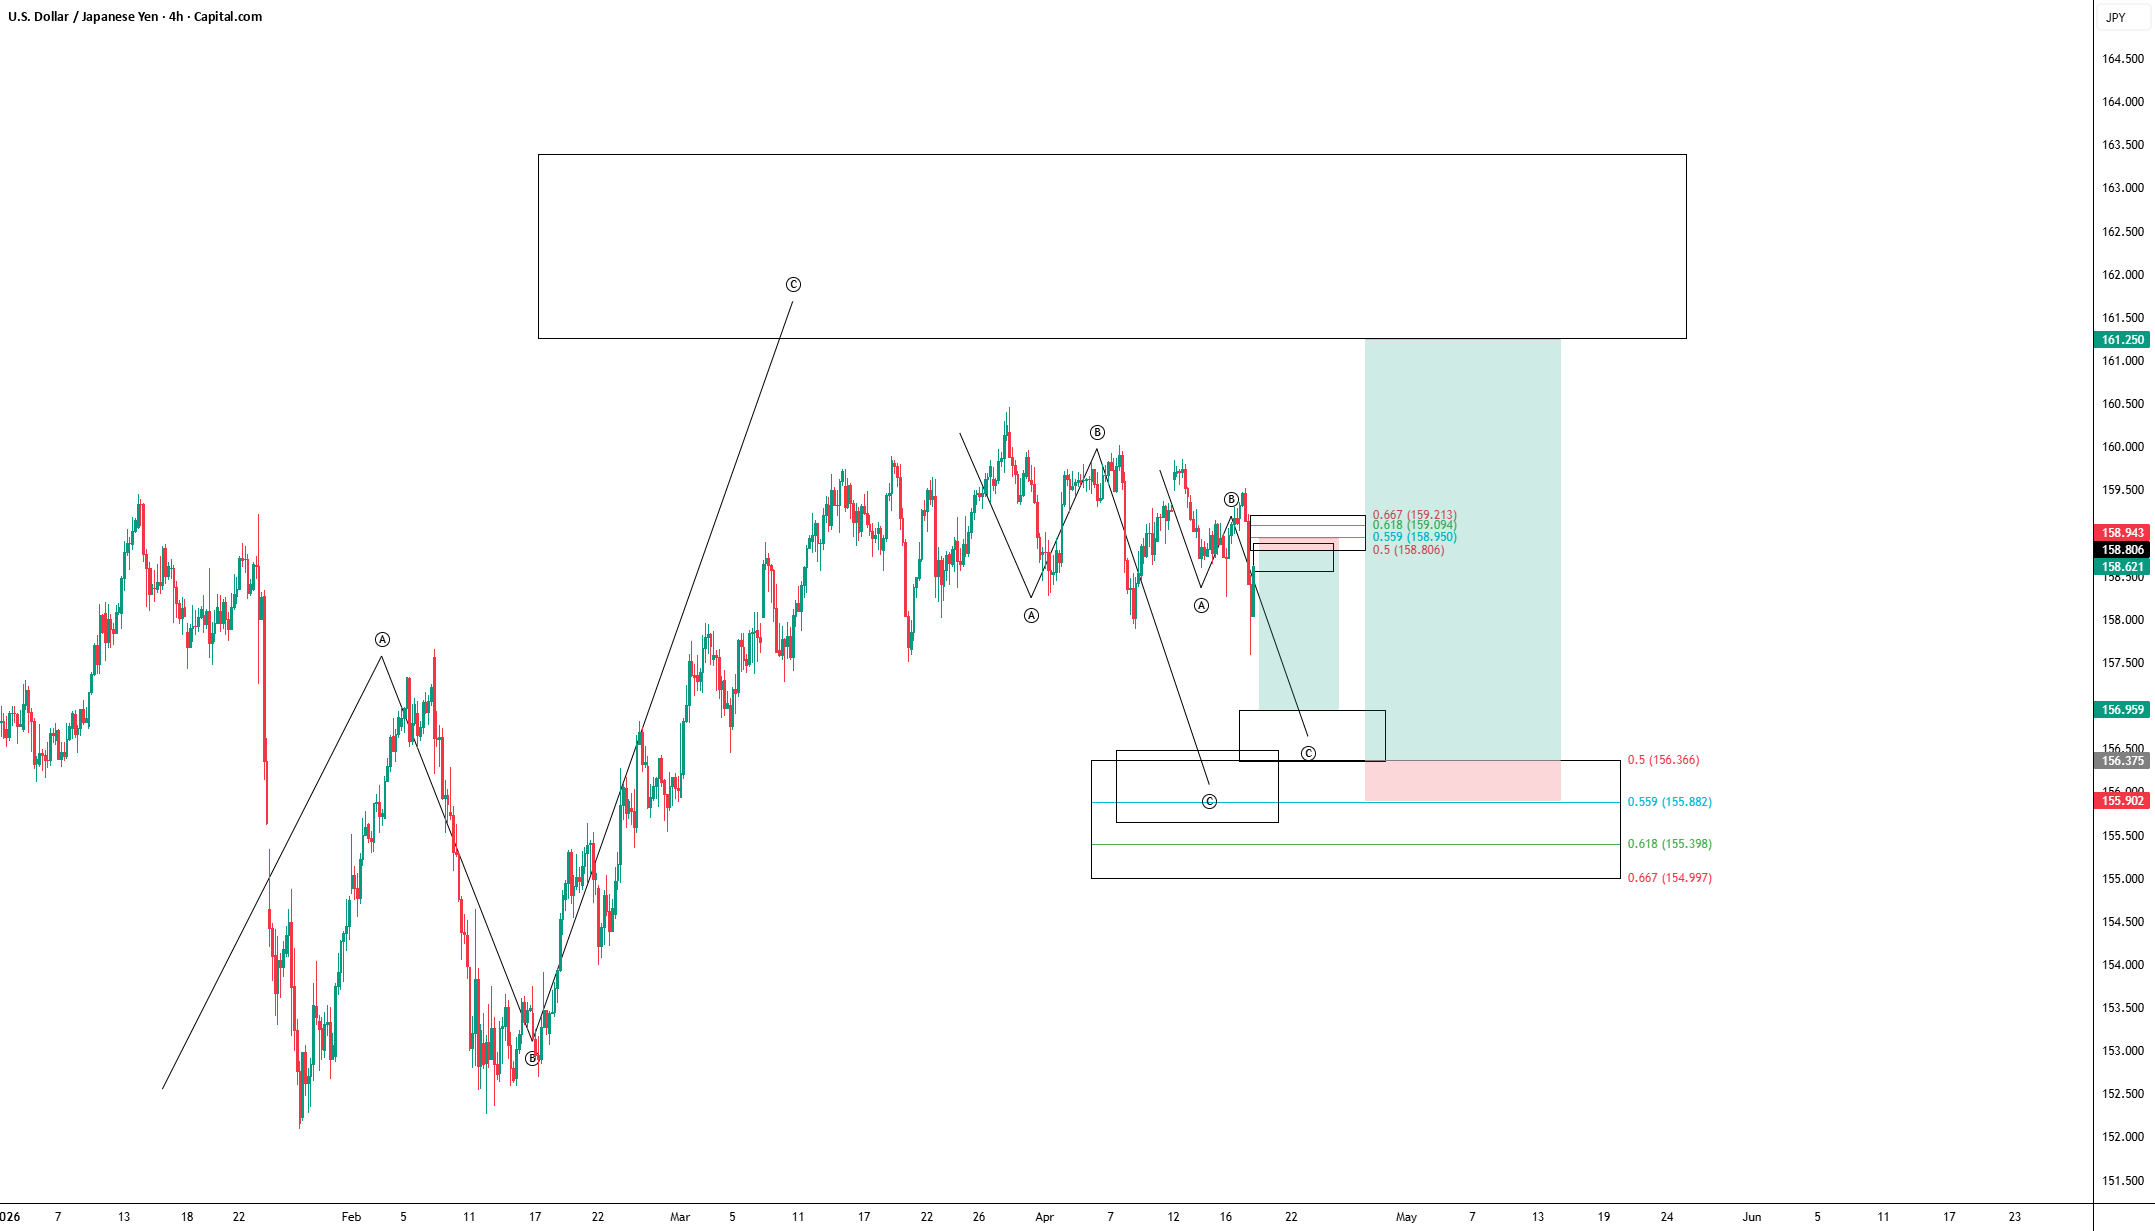
With the recent corrections, two additional bearish structures have been activated. Both have target areas within the primary BC bullish retracement level, providing great confluence for long trading. These structures also provide valid short trading opportunities, and I will implement both.
In each BC patch area, the following management rules apply:
– Entry and Protection: Orders are placed at each level with a Stop Loss (SL) order placed just before the next level.
– Risk mitigation: Once the trade reaches 2 R/R, the stop loss is moved to the break-even point (BE).
– Take Profit: From 3 R/R onwards, trailing stops will be used to lock in profits.
Basic structure, bullish, BC retracement level
Secondary structure (1), bearish confluence zone
Secondary structure (2), descending confluence zone
Aligning bearish targets with a bullish retracement zone increases the statistical probability of a long entry. Implementation remains dependent on the price movement reaching the specified levels.
✅ Never miss a Forex trade!